Register an Application
Register new applications to your Konstruct platform for automated CI/CD and deployment across environments.
Summary
This guide walks you through registering a new application in Konstruct. Once registered, your application will be automatically built, containerized, and deployed through a multi-stage pipeline across your configured environments.
Prerequisites
To register a new application, you'll need:
- Application Git repository under your organization's GitHub organization
- Source code in any language on the repository's
mainbranch - Dockerfile in the repository root that successfully builds your application
- GitHub Actions personal access token with repository access permissions
Register Application
-
Navigate to Applications in the left sidebar
-
Click Register application
Application Details
-
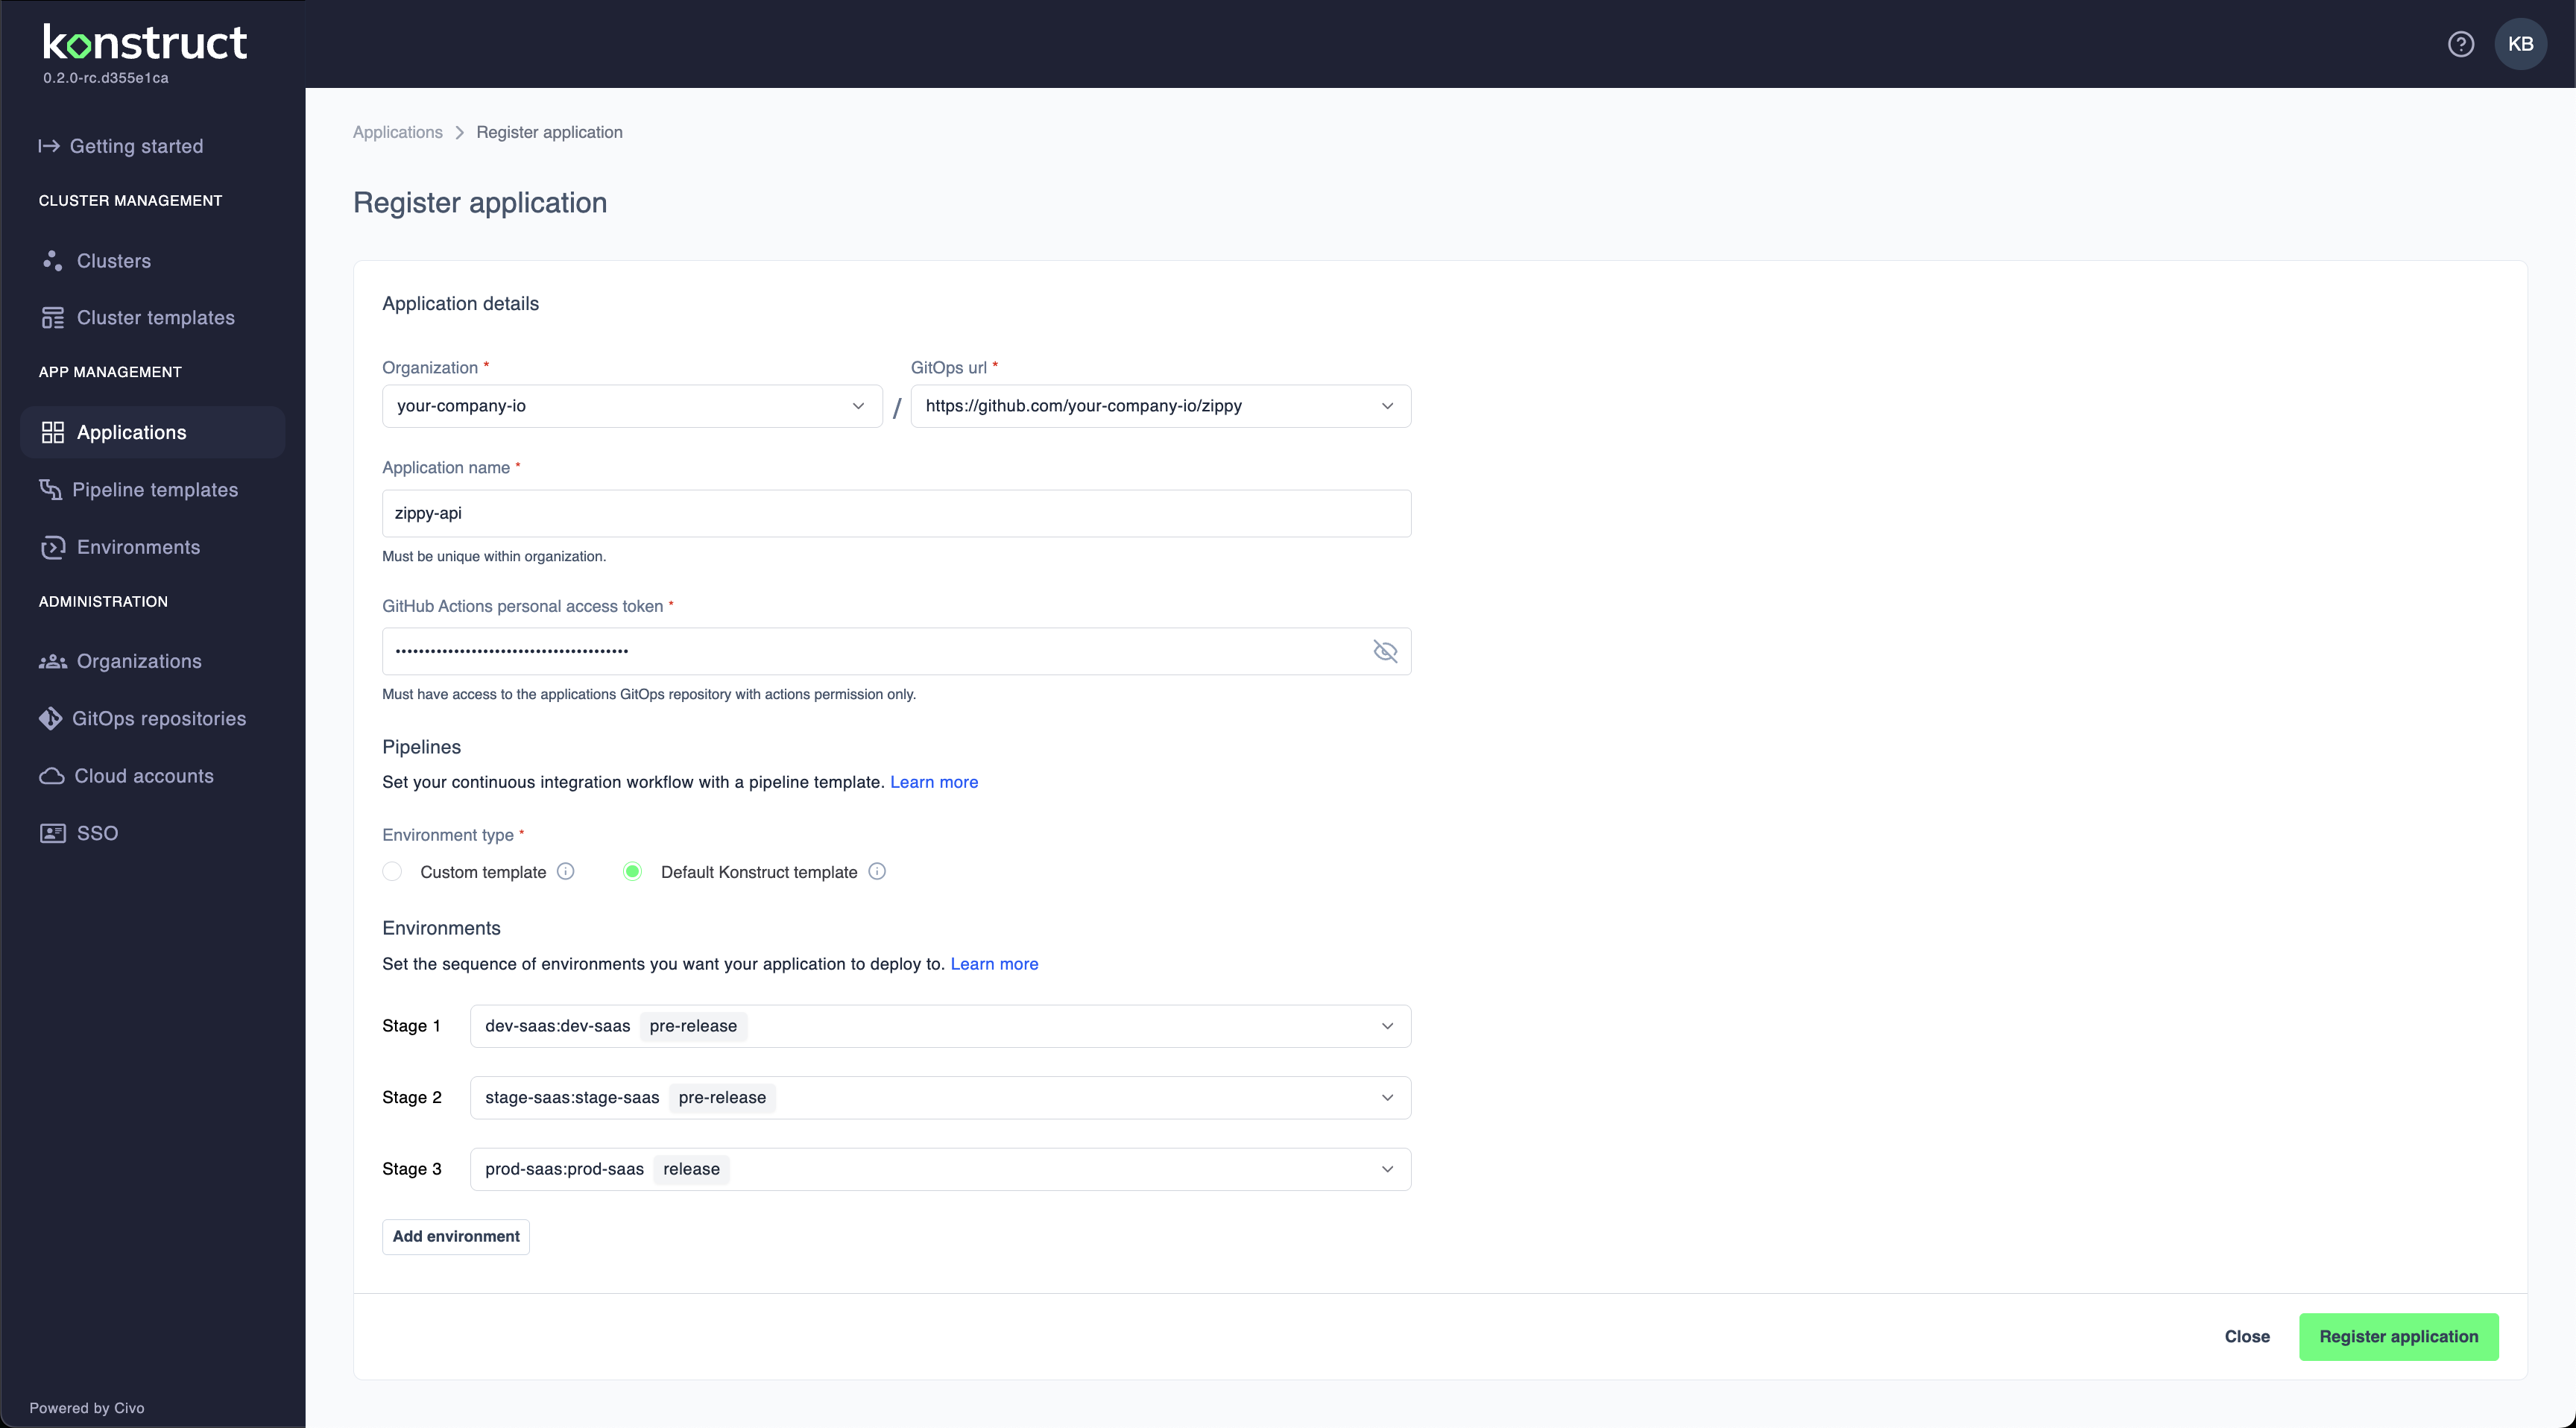
Configure the basic application information:
Organization: Select your organization from the dropdown (e.g., "your-company-io")
GitOps url: Select or enter your application's Git repository URL:
https://github.com/your-company-io/zippyApplication name: Enter a unique identifier for your application (e.g., "zippy-api")
- Must be unique within your organization
- Use lowercase letters, numbers, and hyphens only
- Start with a letter
-
GitHub Actions personal access token: Enter your GitHub personal access token
- Must have access to the application's GitOps repository
- Required for actions permission only
Pipeline Configuration
-
Pipelines: Choose your CI/CD integration approach:
- Set your continuous integration workflow with a pipeline template
- Click Learn more for pipeline template documentation
-
Environment type: Select deployment template:
- Custom template: Use a custom deployment template
- Default Konstruct template: Use standard Konstruct deployment patterns
Environment Deployment Stages
-
Configure your deployment pipeline stages:
Stage 1: Select the first deployment environment (e.g., "dev-saas" → "pre-release") Stage 2: Choose the second stage environment (e.g., "stage-saas" → "pre-release")
Stage 3: Set the final deployment stage (e.g., "prod-saas" → "release")Click Add environment to create additional deployment stages if needed.
-
Click Register application to complete the registration
What Happens Next
Once you register an application:
- GitOps repository setup - Konstruct adds CI/CD automation to your repository
- Multi-stage pipeline creation - Your application is configured for deployment across all specified environments
- GitHub Actions integration - Automated builds are triggered on code commits
- Container and chart publishing - Built images and Helm charts are published to your organization's registries
- Environment-specific deployments - Applications are automatically deployed through your configured pipeline stages
Application Repository Structure
Your application repository should have this initial structure:
your-git-repo/
├── Dockerfile
├── src/
│   ├── main.go
│   ├── app.py
│   └── index.js
└── README.md
The Dockerfile should be able to build your source code. That's the only rule.
After registration, Konstruct automatically adds:
your-git-repo/
├── .github/workflows/
│   ├── publish.yaml
│   └── deploy.yaml
├── charts/
│   ├── templates/
│   ├── values.yaml
│   └── Chart.yaml
├── Dockerfile
├── src/
└── README.md
Automated CI/CD Pipeline
The GitHub Actions workflow automatically:
- Builds your Dockerfile into a container image
- Publishes the container to your organization's AWS ECR registry
- Creates semantic version Helm charts for each build
- Deploys through your configured environment stages
- Monitors deployment health across all environments
Important Notes
- Application names must be unique within your organization
- GitHub token requires repository access permissions
- Pipeline templates can be customized for advanced workflows
- Environment stages deploy sequentially (Stage 1 → Stage 2 → Stage 3)
What's Next?
- Create environments for your deployment stages
- Set up pipeline templates for advanced automation
- Monitor application deployments in the Applications dashboard